
Custom Home Builder AV & Home Automation in Phoenix
Low-voltage pre-wire, home theaters, whole-home audio and integrated controls, planned around your new construction schedule.

Technology Built Into the Home
A technology partner from plans to move-in
A custom home's technology decisions start well before the equipment arrives. Speaker locations affect ceilings. Shade wiring depends on the selected motors. A theater needs a seating plan, and the network needs somewhere accessible to live. Resolving those details while the home is being designed gives the builder and homeowner a clearer scope before walls close.
Audio Video by Design helps custom home builders in Phoenix, Scottsdale and the West Valley plan and install low-voltage infrastructure, home automation and entertainment systems for new homes. We bring pre-wiring, home theaters, whole-home audio, networks and compatible controls into one project conversation with the builder and design team.
Start with the floor plans, anticipated rough-in dates and the homeowner's priorities. Together, we can distinguish the infrastructure needed now from equipment and features that may be installed in a later phase.
Low-voltage pre-wiring before the walls close
Pre-wire means installing the planned low-voltage cabling and pathways while the framing is accessible. The right package follows a room-by-room design: wired network outlets, Wi-Fi access points, speakers, displays, projectors, cameras, video intercoms and supported control devices each have different requirements. A bundle of identical cables in every room rarely answers all of those needs.
Decide where cables begin and end, what each connection will serve, and which routes should remain accessible. Coordinate low-voltage routes with the electrical contractor and other trades. Where a selected shade or control system requires power or dedicated wiring, confirm its exact requirements before rough-in. Cable selection, installation methods and applicable requirements belong in the project-specific design.
Before insulation or drywall proceeds, agree on the builder’s walkthrough, cable identification, applicable testing and the records included in the scope. Labels and route documentation help distinguish an installed connection from a planned future connection. If a room will receive equipment later, make that distinction explicit rather than leaving the homeowner to discover what is missing after move-in.
Decisions to settle before rough-in
Review the technology plan alongside the architectural, electrical and interior plans. These decisions affect physical space and other trades, even when the equipment will be installed much later.
Rooms, furniture and control locations
Mark the main seating positions, television walls, home office connections and convenient keypad or touchscreen locations. A furniture change can alter speaker coverage, sightlines and the placement of controls.
Ceilings, lighting and windows
Coordinate speakers and access points with beams, downlights and HVAC grilles. Review shade pockets, window dimensions and power or communication requirements against the actual selected system, not an assumed generic motor.
Equipment space and cable pathways
Allow for the equipment footprint, cable entry, service access, electrical power and airflow. A rack concealed in millwork still needs access after the cabinetry is finished. Discuss practical conduit routes to locations likely to change.
Outdoor areas and detached spaces
Include patios, poolside listening areas and detached guest or work spaces when they are part of the project. Identify routes between spaces, suitable equipment for its exposure, and any additional network or control requirements.
Trade responsibilities and schedule
Identify who provides low-voltage wiring, line-voltage power, blocking, conduit, shade pockets and other building work. Confirm rough-in access and inspections with the builder; the AV schedule must fit the overall construction sequence.
Selections, allowances and future phases
Separate approved selections from allowances and optional upgrades. Record which rooms are fully installed at handover, which are pre-wired only, and what a later phase would require. Resolve changes before they affect finished surfaces.
Bring the Technology Plan Into the Construction Plan
Coordinate locations, responsibilities and rough-in timing before the selections become difficult to change. Bring your plans and construction milestones to a builder consultation with Audio Video by Design.

Integrated home automation built around everyday routines
Full-home automation starts with the functions the household wants to use. An arrival scene could turn on selected lights. A movie scene might dim compatible fixtures and lower supported shades. A goodnight command can coordinate agreed rooms without changing a sleeping child’s room. Define the result first, then choose the products and control platform that can deliver it.
Physical keypads, touchscreens and apps provide direct control; scenes, schedules and supported events provide automation. Include a simple way to override an automated action. Visitors and family members should be able to use essential room functions without understanding every setting.
Compatibility is specific to the selected equipment and integration method. Confirm the exact lighting controls, shade motors, thermostats, displays and other devices, including any accounts or subscriptions. Agree on which functions depend on the internet and what remains available during an outage. Installing every category of device does not, by itself, make those devices work together.
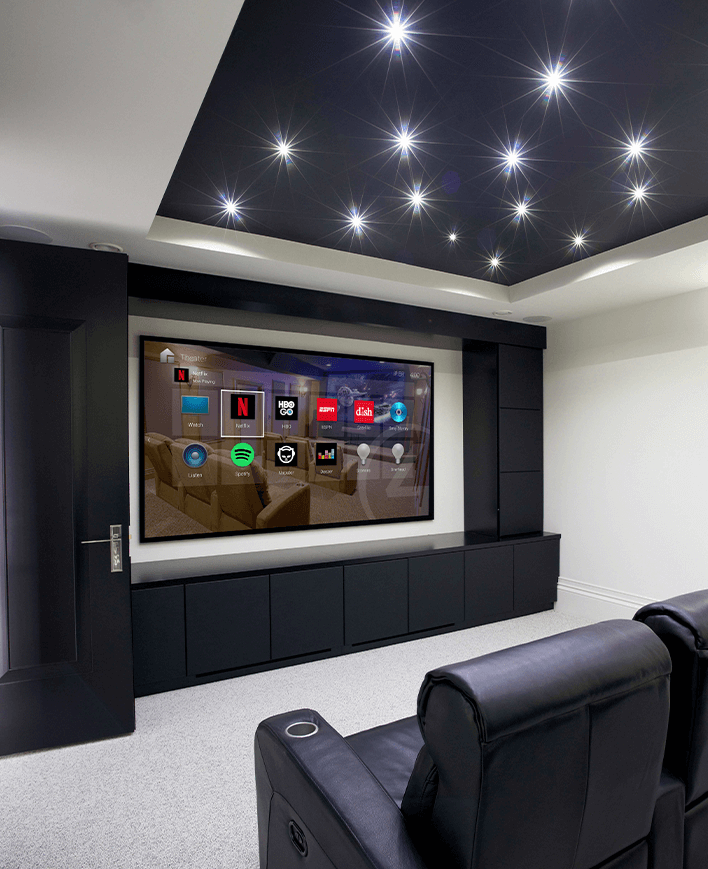
Home theaters and media rooms designed before framing is final
A theater plan should begin with the primary seats, sightlines and room use. Choose a screen or display appropriate to the viewing distance, available light and intended layout. For a projector, coordinate its position and connection path with the selected lens, screen and mounting requirements. Leave decisions about cabinetry, ceiling features and equipment access in the same conversation.
Surround and overhead speakers have distinct roles. Speaker positions should follow the listener and intended sound format, not simply whichever ceiling locations are easiest to wire. Acoustic treatment addresses sound within the room; reducing sound transfer to adjacent rooms may also involve construction assemblies and the design team.
A dedicated theater prioritizes movie watching, while a media room also serves everyday living. Both benefit from planned power, cable pathways, equipment ventilation and light control. Agree on which wiring, AV equipment, mounting, acoustic work and building work are included so the builder and homeowner are comparing the same scope.
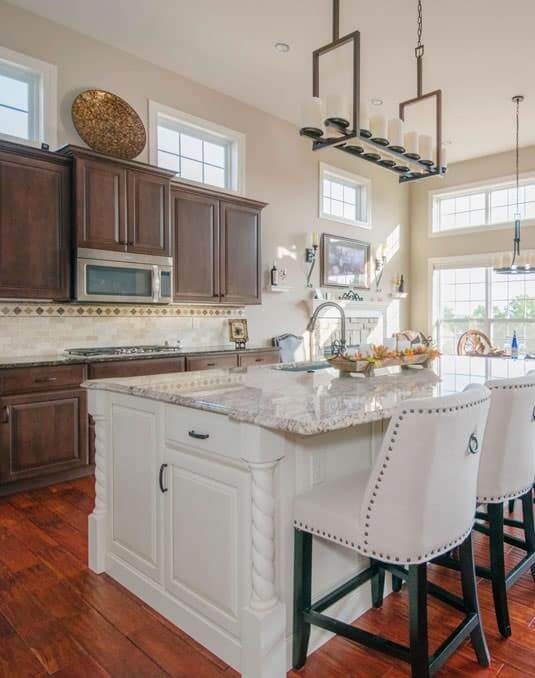
Whole-home audio planned by listening zone
Map the home by how people want to listen. The kitchen and living room might share a playlist, while an office or bedroom needs independent volume and a different source. Speaker count, audio-zone count and the number of simultaneous sources are separate design decisions. Define each one before choosing amplifiers and controls.
Plan speaker placement with ceiling details, furniture and the intended coverage. Include outdoor entertaining areas where requested, using equipment suited to its actual exposure. Consider how the patio and interior zones should work together without assuming that every source can play everywhere at once.
Pre-wiring can reserve selected rooms for a later installation, but the initial equipment must be reviewed for the intended expansion. Confirm supported streaming services, account requirements and the controls the homeowner will use. The finished walkthrough should show how to select a room, adjust volume and group or separate supported zones.

The home network is part of the building infrastructure
The internet provider’s handoff, router, network switches and Wi-Fi access points need an intentional plan. Identify wired connections for stationary devices, home offices and selected AV equipment. Place access points according to the floor plan and construction materials, with coverage needs discussed for bedrooms, patios and detached spaces.
Wired access-point connections reduce reliance on wireless links between network devices where practical. For equipment powered over Ethernet, confirm the devices’ requirements and the switch’s available power budget. Keep network equipment accessible so a service visit does not require dismantling finished cabinetry.
Verify coverage in the finished home, because walls, finishes, interference and client devices affect results. A planned access-point count is a starting design decision rather than a universal square-foot guarantee. The local network also cannot increase the internet service purchased from the provider. Discuss both the connection entering the house and the connections used inside it.

Coordinate lighting control and motorized shades early
Lighting control involves the fixture, lamp or driver as well as the keypad or dimmer. A fixture marked dimmable still needs a compatible control pairing. Review fixture schedules, supported dimming methods, keypad locations and any centralized equipment with the lighting designer and electrical contractor before selections are locked.
Motorized shades also affect the building details. Confirm the chosen shade system’s power and communication requirements, the window dimensions, recesses or pockets, mounting approach and access for service. Different motors and systems use different wiring arrangements; installing an assumed cable package can create avoidable rework.
For Phoenix-area homes, discuss how the homeowner wants to manage afternoon glare, privacy and room light throughout the day. Supported schedules and scenes can coordinate shades and lighting, with manual choices available when routines change. Review behavior room by room instead of promising the same result at every window.
More systems to include in the new-home scope
Discuss these options during planning so their locations, infrastructure and responsibilities are understood even when installation is phased.
Displays and distributed video
Plan mounting locations, power, structural support and serviceable cable routes with the builder. Discuss sources and simultaneous viewing needs before selecting a distribution system. Confirm the exact formats, distance limits and equipment requirements.
Explore distributed videoCameras and video intercoms
Review the views required at entrances and selected exterior areas, cabling, network power and recording needs. Discuss account access, privacy and any ongoing storage costs. A camera or intercom installation is not a guarantee of security.
Explore camerasClimate control integration
Coordinate supported thermostats and integration capabilities with the HVAC contractor and selected equipment. Confirm available functions and override behavior. Home automation integration does not replace HVAC design, commissioning or required trade work.
Explore HVAC controlVoice and convenient room controls
Consider voice integration alongside physical controls rather than as the only way to operate a room. Review supported commands, account setup, privacy preferences and internet dependence for the chosen platform.
Explore voice integrationA construction sequence for the technology package
Use these milestones to agree on timing and responsibility. The actual sequence follows the builder’s schedule, selected systems and project requirements.
Design and scope review
Review the plans, room uses, homeowner priorities and preliminary selections. Identify the technology locations, equipment space, interfaces and dependencies on other trades. Clarify what the proposal includes and what remains an allowance.
Pre-wire and rough-in
Install the agreed low-voltage infrastructure at the coordinated construction stage. Address cable routes, supported device locations and pathways while access is available. Review design changes before they become field assumptions.
Review before walls close
Agree on the walkthrough, labels, testing and installation records. Identify unresolved selections and future-only locations. Changes should be communicated to the builder and the relevant trades before finishes proceed.
Trim-out and equipment installation
Once the site is ready, complete agreed terminations, mounts, speakers, controls and equipment installation. Confirm that finished details still provide the access and space allowed in the design.
Programming and system checks
Configure the approved functions and test scenes, room controls, source selection, network coverage and supported integrations. Discuss local control and agreed outage behavior as part of the actual system configuration.
Homeowner walkthrough and support
Review everyday operation, overrides, account ownership and any subscription requirements with the homeowner. Agree on the documents provided, open items, warranty terms and how service or later changes will be requested.
Define the package before comparing builder allowances
The useful question is what the allowance buys. A pre-wire package, a finished theater and an integrated whole-home system involve different equipment, labor and programming. Room count alone does not capture the complexity. Cable access, selected controls, audio zones, theater requirements and the number of supported integrations all affect scope.
Separate the infrastructure, equipment, installation and programming in the discussion. Confirm responsibility for electrical work, blocking, cabinetry changes and other construction dependencies. Identify optional upgrades, recurring services and the effect of changing selections after rough-in.
Pre-wire for a later installation
Reserve the agreed connections and pathways now, with equipment installed later. Document exactly what is provided and what remains to be purchased, terminated or configured. Future readiness is specific to the plan; it is not compatibility with every future product.
Complete selected rooms first
Prioritize a theater, shared living areas or core controls while planning the remaining rooms. Review how the initial network and equipment will support the intended next phase, including any limits that would require replacement or additional work.
Install a coordinated whole-home package
Bring the agreed entertainment, network and compatible controls into one defined installation and handover. Record the functions to demonstrate, the interfaces provided and the support arrangements rather than relying on a vague smart-home label.









Testimonials
What Our Customers
Say About Us
Work with a local AV team in Phoenix and the West Valley
Audio Video by Design AZ, LLC is based in Peoria and serves Phoenix, Scottsdale, Peoria, Glendale and Surprise. Our residential services cover AV design, home automation, home theaters, whole-house audio and the connected systems discussed here.
Learn about our team and customer-first approach, then explore our project gallery for examples of home entertainment and control spaces. For a builder consultation, bring the project location, floor plans, anticipated construction dates, preliminary technology budget and the homeowner’s priorities. These details give us a useful starting point for reviewing your new-home scope.
For technical planning background, see CEDIA’s smart-home wiring guidance, Dolby’s speaker layout guidance and Lutron’s system-specific shade wiring guidance. These resources explain design considerations; the actual installation is planned for the selected equipment and construction requirements.
Custom home builder AV and pre-wire questions
When should a custom home builder involve the AV installer?
Begin during design development, before device locations, electrical plans, window details and millwork are finalized. Rough-in is installed at the coordinated construction stage, but the decisions behind it should be made earlier. If framing is already underway, bring the current plans and remaining schedule so available options can be reviewed.
What should a new-home low-voltage pre-wire package include?
The package should identify cable destinations, supported uses, central equipment locations, agreed pathways and the rooms or devices included. Discuss labeling, applicable testing and the records provided before walls close. Specify whether each location is for a complete installation or a future phase; a generic room-by-room cable allowance may omit important connections.
Can we pre-wire now and install automation or audio later?
Yes, a phased scope can reserve agreed infrastructure for later equipment. Review the intended controller, network capacity, rack space and room connections at the start. Some later additions may still require different equipment or additional work. Document what is pre-wired, what is finished and what the next phase depends on.
Who provides electrical power, blocking and construction work?
Agree on responsibility with the builder and the relevant trades before work begins. Low-voltage installation, line-voltage electrical work, structural support, conduit, cabinetry and shade pockets are distinct scope items. The technology plan identifies dependencies; the proposal and construction documents should identify who performs each part.
Can the theater and whole-home audio share equipment?
Some sources or control functions may be shared, but theater channels, audio zones and simultaneous playback requirements need separate consideration. Discuss who will listen in each room, what sources are needed at the same time, and whether the theater must operate independently. The selected equipment determines the supported combinations.
Does full-home automation require internet for every function?
Requirements vary by the selected platform and devices. Some local controls may remain available, while remote access, cloud voice commands or streaming can depend on internet service. Review each essential function and the intended outage behavior during design and demonstrate the agreed behavior at handover.
What determines the cost of a builder AV package?
Cost follows the actual design: cable routes and access, room and zone counts, network requirements, display and theater selections, control interfaces, integration complexity and programming. Allowances should identify equipment, installation, other-trade work, optional upgrades and recurring costs. Share a budget range so priorities and phases can be evaluated together.
What do builders need for a productive first consultation?
Bring the project address or city, floor plans, reflected ceiling or electrical plans if available, rough-in dates, preliminary window and lighting selections, and the homeowner's technology priorities. Identify the budget range and the decision-makers. Existing equipment or preferred products should be listed so their suitability can be reviewed.
What should be covered at homeowner handover?
Agree on a walkthrough of everyday controls, scene overrides, audio zones, source selection and the selected integrations. Review account ownership, subscriptions, installation records, open items, warranty terms and the service contact. Handover is most useful when the homeowner can repeat the common tasks, not simply watch a demonstration.
Which Phoenix-area communities does AV By Design serve?
We serve Phoenix, Scottsdale, Peoria, Glendale and Surprise. For a new construction project, share its location and schedule so the AV team can discuss the proposed scope and coordination needs. Contact Audio Video by Design at (480) 242-6459 or sales@avbydesign.com.
Share your plans and schedule with Audio Video by Design to review the infrastructure, systems and installation phases appropriate for your project.
Phone Number
(480) 242-6459Office Address
30249 N. 124th Lane,
Peoria, AZ 85383
SEND US A MESSAGE


